Replace Screen


Toshiba Satellite L305 L305D

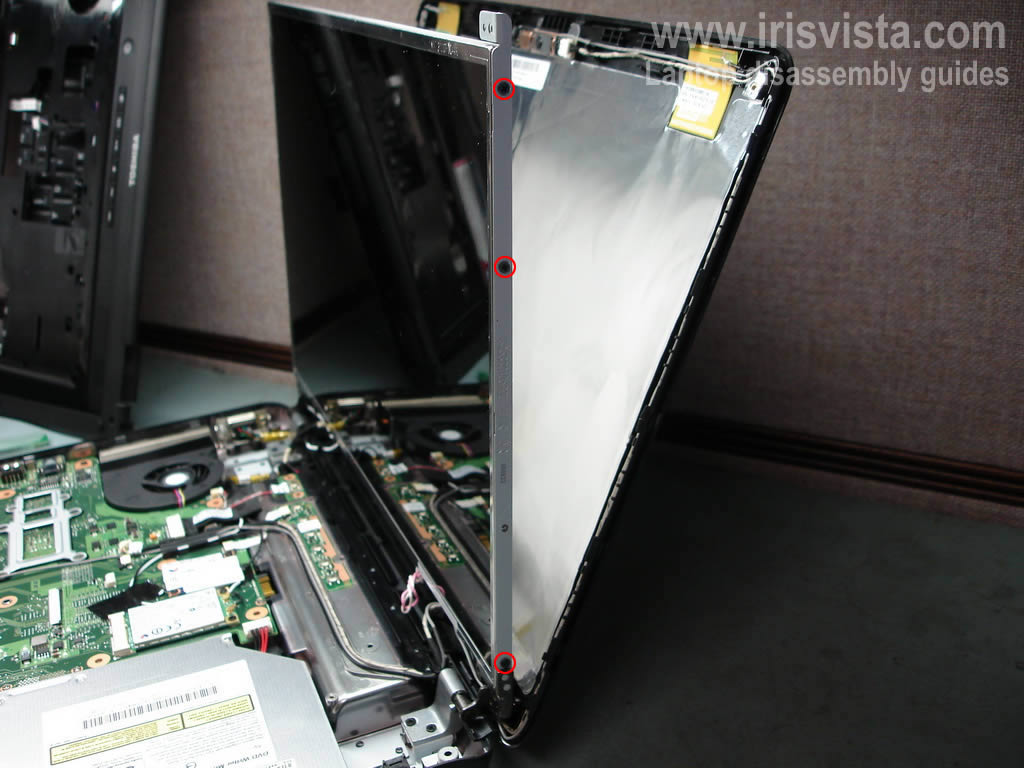
How to remove the LCD screen and replace the video cable in a Toshiba Satellite L305/L305D and Satellite L300/L300D laptops.

In this guide I'll be taking apart a Toshiba Satellite L305/L305D laptop. Also, you can use this guide for taking apart Toshiba Satellite L300/L300D laptops. In order to replace the video cable, we'll have to remove the laptop top cover and disassemble the display panel. This guide has 3 pages, make sure to read through all pages before you start.
If you need spare parts for your laptop, you can search here by the part name and laptop model.
A few things to know before you start taking your laptop apart.
Here you can post comments and question.

Click on any picture to enlarge.


Remove screws from bottom 
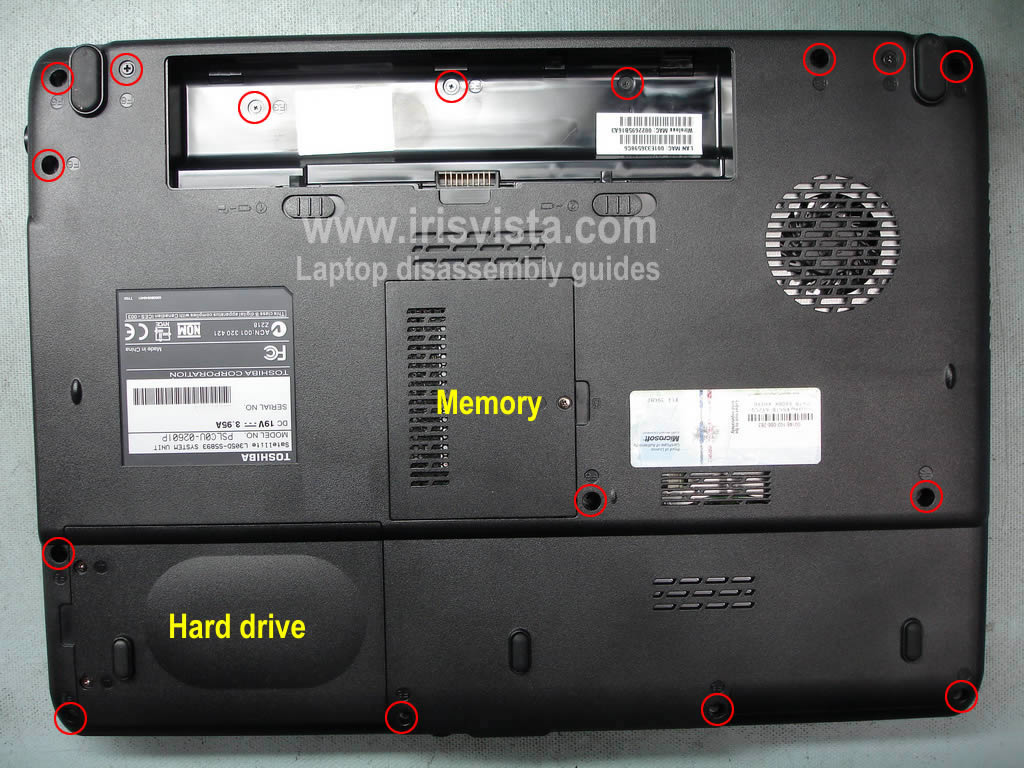
STEP 1
Turn off the laptop, unplug the power adapter and remove the battery.
Remove all marked screws on the bottom.
   
Remove keyboard bezel 
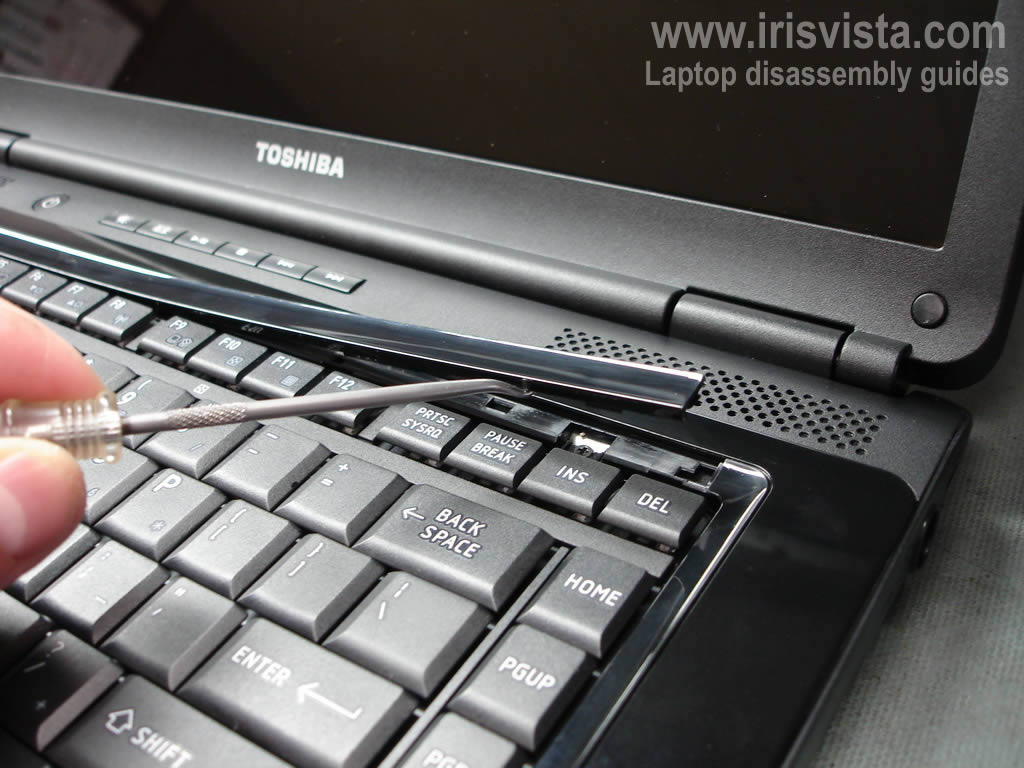
STEP 2
Insert a small flathead screwdriver under the keyboard bezel and carefully lift the bezel up.
Continue removing the bezel with your fingers.
   
Remove keyboard 
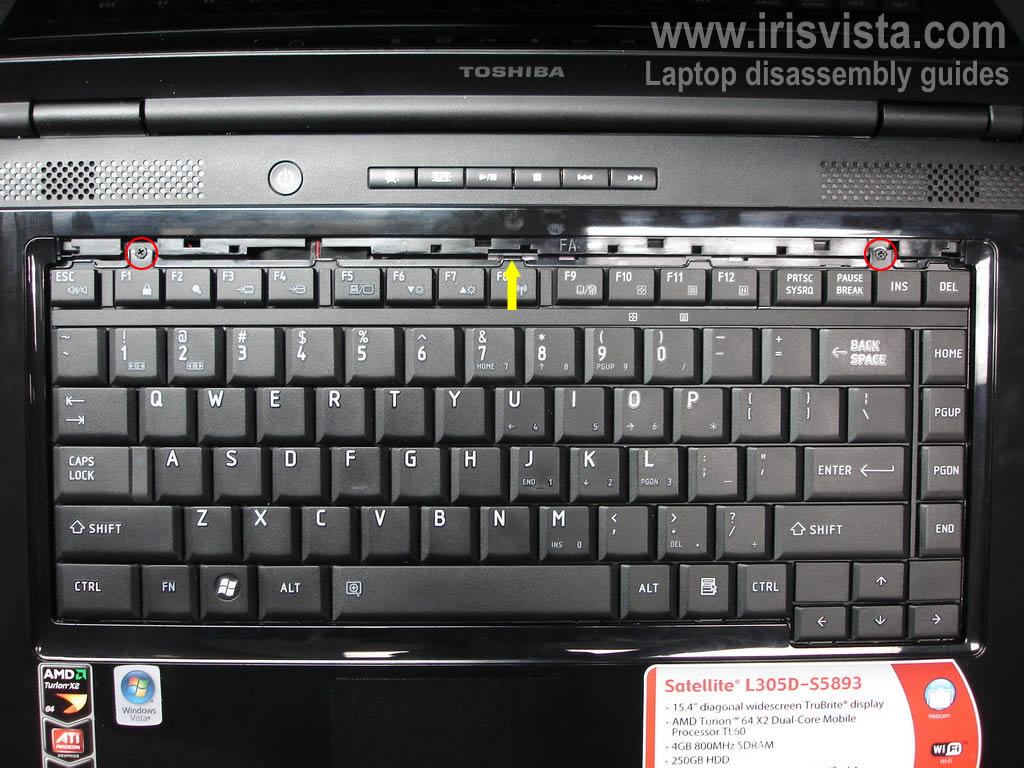
STEP 3
Remove two screws securing the keyboard.
Push on the plastic tab pointed with an arrow.
   
Disconnect keyboard 
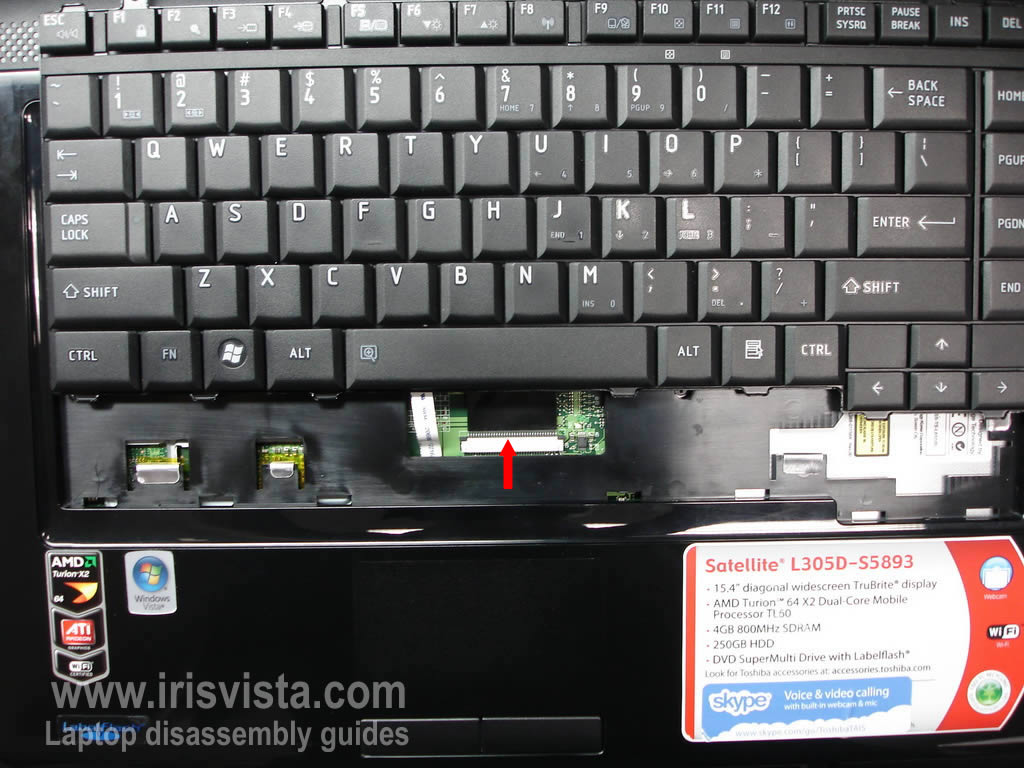
STEP 4
Carefully lift up the keyboard and place is so you can access the ribbon cable underneath the keyboard.
Unlock the connector and release the keyboard cable.
Remove the keyboard.
   
Keyboard connector open STEP 5
In order to unlock the connector you'll have to move the brown tab about 2 millimeters away from the connector base.
On this picture you see the unlocked connector.
   
Remove screws from top cover 
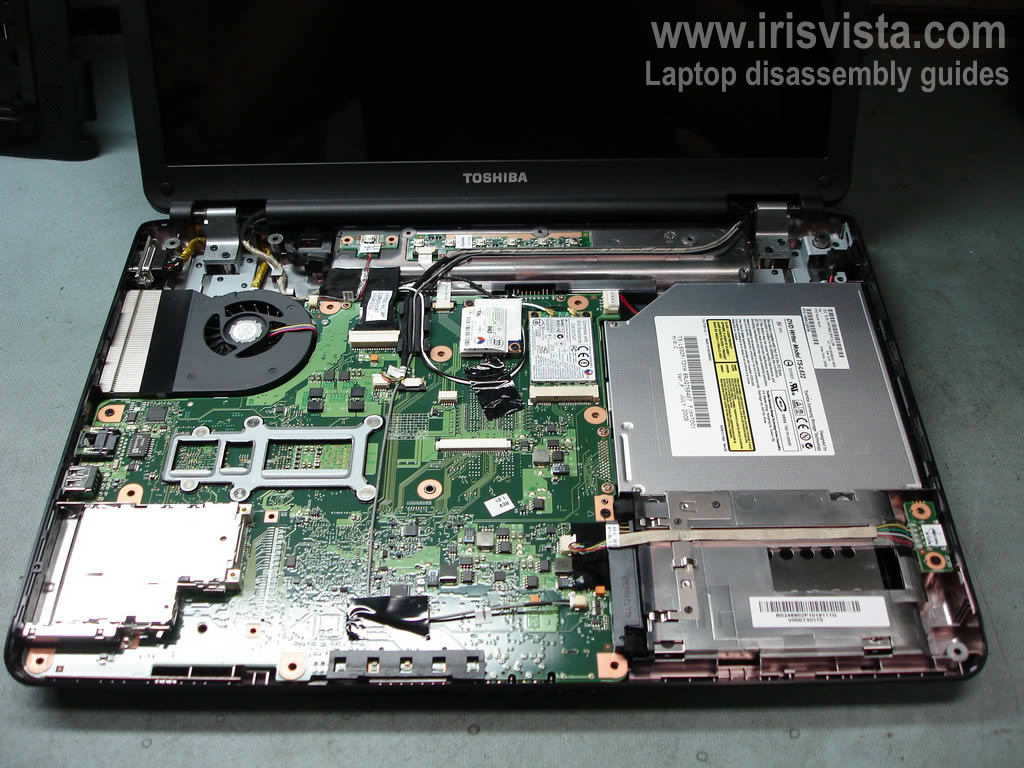
STEP 6
Remove five screws securing the laptop top cover.
Unplug the touch pad cable and the speaker cable from the motherboard.
   
Remove top cover assembly STEP 7
Carefully start removing the top cover assembly.


Remove top cover
STEP 8
Remove the top cover assembly.
 
 
Taking apart display panel STEP 9
The top cover has been removed.
Now we'll start taking apart the display panel.
   
Remove screw seals STEP 10
There are four rubber screw seals in each corner of the display panel.
Remove screw seals with a sharp object and glue them somewhere on the screen bezel so they don't get lost.
   
Remove screws from screen bezel STEP 11
Remove four screws securing the screen bezel.
   
Separate bezel from cover STEP 12
Start separating the screen bezel from the cover with your fingers.
You can use a piece of soft plastic to unlock the latches. As you see I'm using a guitar pick.
   
Removing screen bezel STEP 13
Continue removing the screen bezel with your fingers.
   
Screen bezel removed STEP 14
The bezel has been removed.

 
Remove screen inverter board
STEP 15
Remove one screw securing the screen inverter.
Unplug cables from both sides of the inverter board.
Remove the inverter.
 
 
Remove screws from display hinges STEP 16
Remove four screws securing display hinges, two screws from each hinge.
   
Unplug video cable from LCD STEP 17
Carefully separate the display cover from the screen and access the back side of the LCD screen.
Unglue the sticky tape covering the video cable connector and unplug the cable from the LCD screen.
   
Removing laptop LCD screen STEP 18
Remove three screws from each side of the screen.
These screws secure the LCD screen to the brackets.
   
Replace LCD screen STEP 19
Carefully remove the LCD screen and replace it with a new one if needed.
You can search for very cheap LCD screen here: Satellite L305 and Satellite L305.
   
Unplug video cable STEP 20
Unplug the video cable from the motherboard.
   
Replace video cable STEP 21
Carefully remove the video cable and remove it with a new one if needed.